
Set up your workspace
Choose a setup path, prepare the company’s details and move into your workspace.
On this page
About the current product preview
These guides describe Tamaam’s current product preview. Website reading, service connections and team invitations are demonstrated in the preview; live delivery and syncing are not available there.
Before you start
Use the owner’s setup flow when creating the company’s workspace. If your company already uses Tamaam, ask its owner for an invitation instead of setting up a second workspace.
- Have your company name, location, currency and time zone ready.
- Gather your logo, brand colors, services and the kinds of clients you serve.
- If you choose Nefer’s path, have your company’s website address ready.
Choose how to set up
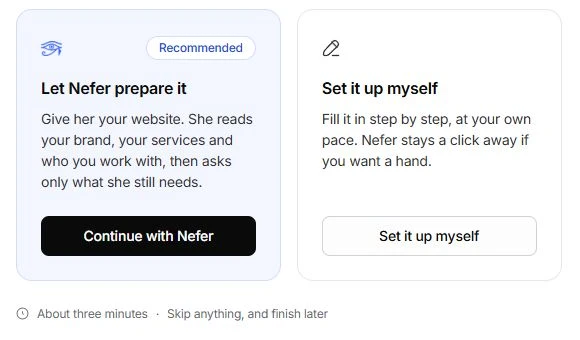
- Open the welcome screen.
Choose Continue with Nefer to start from a website, or Set it up myself to enter the details yourself.
- Prepare the company details.
On the manual path, work through Your studio, What you offer and Your brand. On Nefer’s path, review what she found and answer A few questions.
- Review What Nefer prepared.
Read the proposed kit and keep the items that fit your company. A prepared template is a starting point, not a document already sent to a client.
- Review connections and the team.
Continue through Connect where work arrives and Your team. Use Skip on a step you want to return to later.
- Enter the workspace.
Finish the Ready screen. Open Getting started inside Tamaam to see the remaining setup work.
Change the details later
- Settings → General: company details, location, currency and time settings.
- Settings → Branding: logo and colors.
- Settings → Business brain: the company, services, clients and voice Nefer works from.
- Settings → Members: people, roles and client-mail access.
Complete the manual setup screens
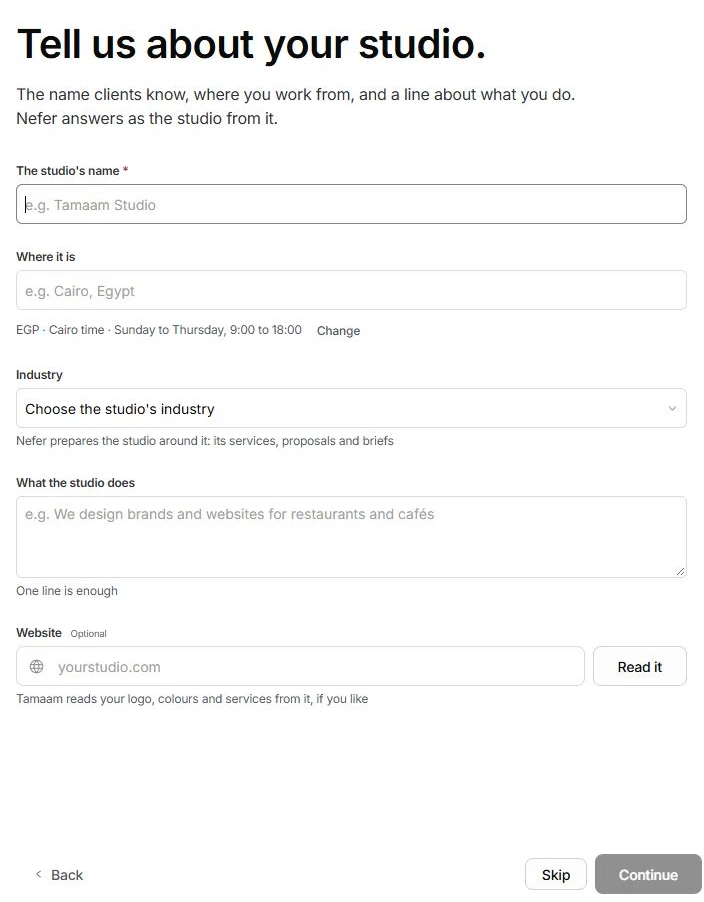
- Your studio: name the company.
Enter The studio’s name. Add Where it is, choose the Industry and describe What the studio does. Change opens currency, time zone and working hours. Website is optional. Continue becomes available when the required name is present.
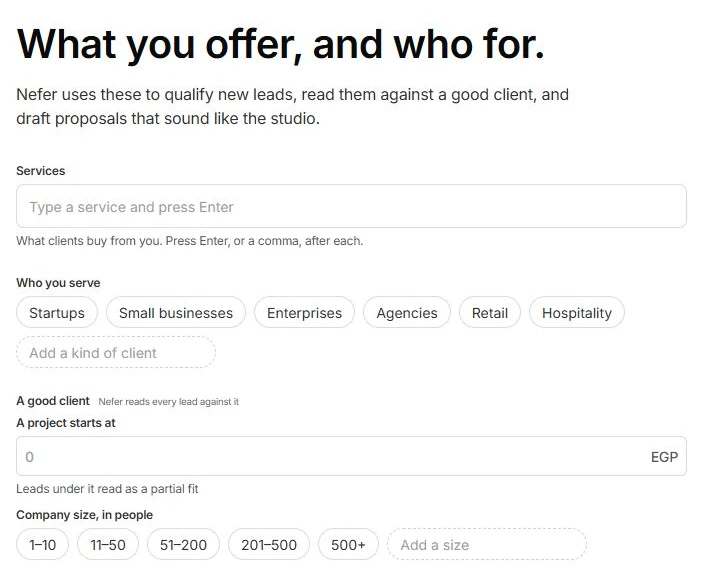
- What you offer: add services and clients.
Type a service and press Enter or a comma. Choose Who you serve or add a kind of client. A project starts at and Company size describe a good client; they help Nefer assess a lead. Continue needs at least one service or kind of client.
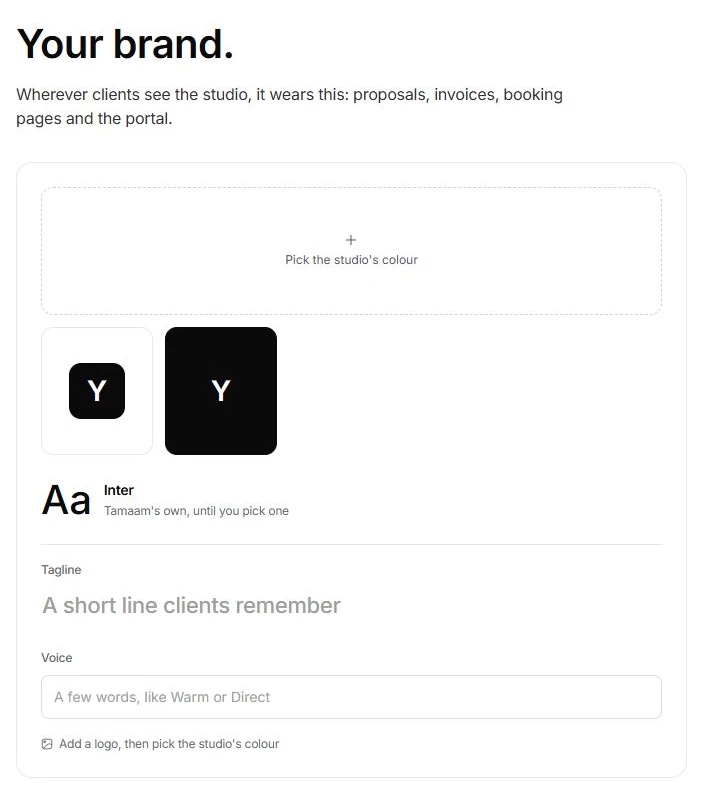
- Your brand: add a logo or color.
Choose Add a logo, Add a colour or one of the starting palettes. Add a tagline and voice words if you have them. Continue needs a logo or a color. The preview beside the form shows how the identity appears to clients.
- Prepared, Connect and Your team: review each decision.
Inspect what Nefer prepared before keeping it. Review the mailbox, calendar and invitation choices. These are local demonstrations in the current preview; using them does not authorize or connect a live account. Skip any step you are not ready to complete.
If you cannot continue
Check the required fields on the current step and correct the field showing an error. If you do not have the information yet, use Skip where it is available and return through Getting started. If this is a team invitation, follow the joining guide rather than the owner’s setup flow.
Reviewed by the Tamaam product team against the Block 5 product preview. If a screen or step changes, tell us below.
Was this article helpful?
Need help with your workspace?
A support request lets the team reply to you directly.
Get help with this article